DHT11 and DHT22 are very frequently used in projects that need to measure environment temperature and humidity. They have different range of measurement and accuracy.
In order to make DHT11/22 work properly, usually you need to connect a 4.7~10K pull-up resistor between the data pin and the VCC. Our DHT11 and DHT22 modules already have this pull up resistor on board and you can just connect them to your Raspberry Pi directly.
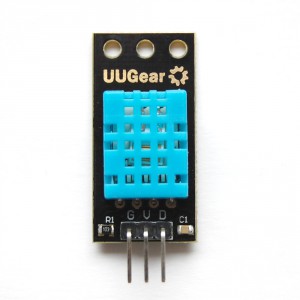
DHT11 Module
Power: DC 3~5V
Pins: G (GND) – V (VCC) – D (Data)
Humidity Measurement: 20~80% humidity reading with 5% accuracy
Temperature Measurement: 0~50°C temperature reading with ±2°C accuracy
Should not measure more than once per second
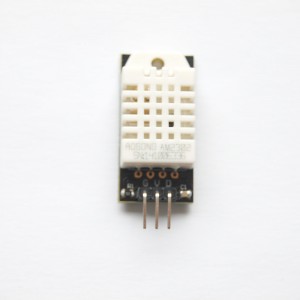
DHT22 Module
Power: DC 3~5V
Pins: G (GND) – V (VCC) – D (Data)
Humidity Measurement: 0~100% humidity reading with 2~5% accuracy
Temperature Measurement: -40~125°C temperature reading with ±0.5°C accuracy
Should not measure more than once in every two seconds
The Wiring
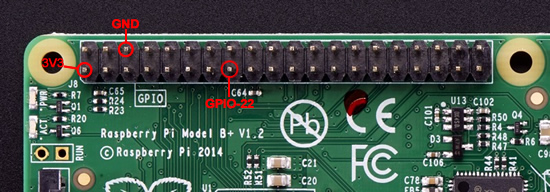
The wiring is very simple, just connect the G pin to ground (GND), V pin to +3.3V (or 5V), and D pin to the GPIO pin that you choose.
In our example, we choose GPIO-22 (pin 3 in wiringPi’s default numbering).
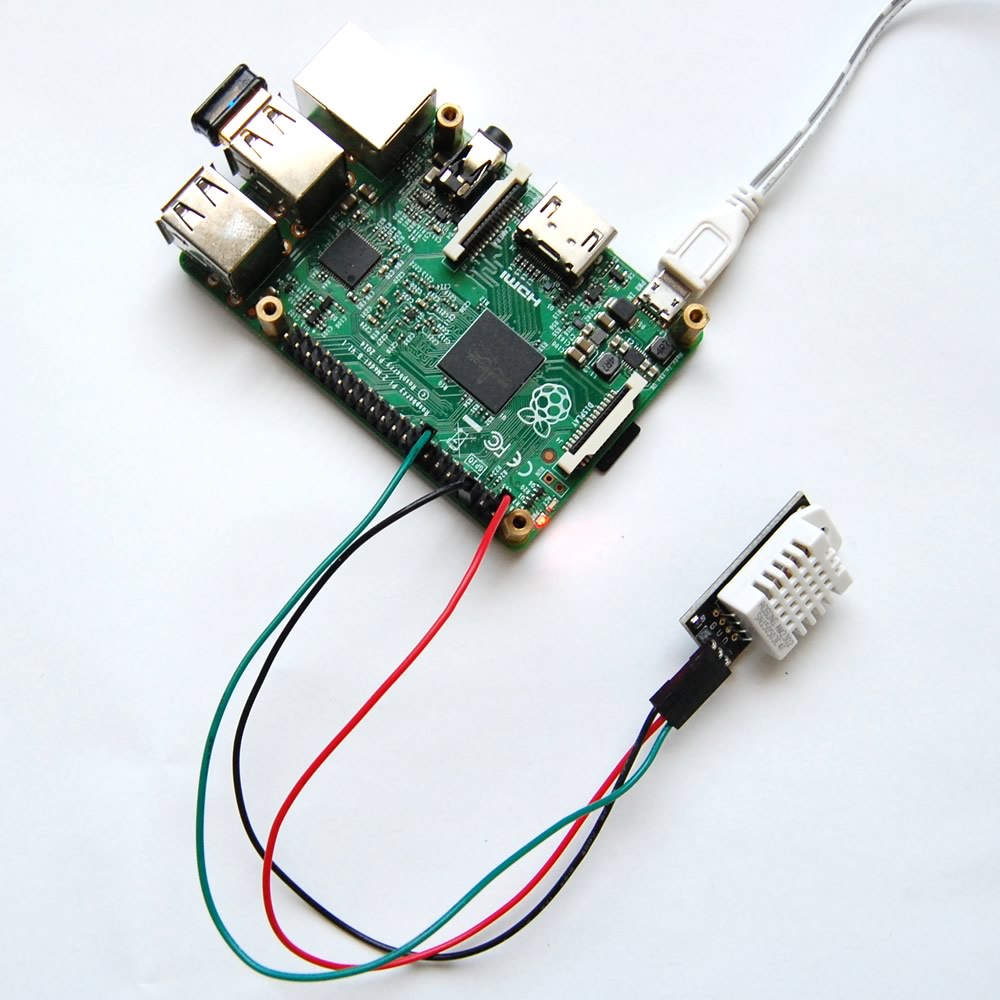
The figure below shows how a DHT22 module is connected to Raspberry Pi:
Example Source Code
Below is an example that could work with both DHT11 and DHT22 modules. The source code is in C language:
/*
 *  dht.c:
 *	read temperature and humidity from DHT11 or DHT22 sensor
 */
#include <wiringPi.h>
#include <stdio.h>
#include <stdlib.h>
#include <stdint.h>
#define MAX_TIMINGS	85
#define DHT_PIN		3	/* GPIO-22 */
int data[5] = { 0, 0, 0, 0, 0 };
void read_dht_data()
{
	uint8_t laststate	= HIGH;
	uint8_t counter		= 0;
	uint8_t j			= 0, i;
	data[0] = data[1] = data[2] = data[3] = data[4] = 0;
	/* pull pin down for 18 milliseconds */
	pinMode( DHT_PIN, OUTPUT );
	digitalWrite( DHT_PIN, LOW );
	delay( 18 );
	/* prepare to read the pin */
	pinMode( DHT_PIN, INPUT );
	/* detect change and read data */
	for ( i = 0; i < MAX_TIMINGS; i++ )
	{
		counter = 0;
		while ( digitalRead( DHT_PIN ) == laststate )
		{
			counter++;
			delayMicroseconds( 1 );
			if ( counter == 255 )
			{
				break;
			}
		}
		laststate = digitalRead( DHT_PIN );
		if ( counter == 255 )
			break;
		/* ignore first 3 transitions */
		if ( (i >= 4) && (i % 2 == 0) )
		{
			/* shove each bit into the storage bytes */
			data[j / 8] <<= 1;
			if ( counter > 16 )
				data[j / 8] |= 1;
			j++;
		}
	}
	/*
	 * check we read 40 bits (8bit x 5 ) + verify checksum in the last byte
	 * print it out if data is good
	 */
	if ( (j >= 40) &&
	     (data[4] == ( (data[0] + data[1] + data[2] + data[3]) & 0xFF) ) )
	{
		float h = (float)((data[0] << 8) + data[1]) / 10;
		if ( h > 100 )
		{
			h = data[0];	// for DHT11
		}
		float c = (float)(((data[2] & 0x7F) << 8) + data[3]) / 10;
		if ( c > 125 )
		{
			c = data[2];	// for DHT11
		}
		if ( data[2] & 0x80 )
		{
			c = -c;
		}
		float f = c * 1.8f + 32;
		printf( "Humidity = %.1f %% Temperature = %.1f *C (%.1f *F)\n", h, c, f );
	}else  {
		printf( "Data not good, skip\n" );
	}
}
int main( void )
{
	printf( "Raspberry Pi DHT11/DHT22 temperature/humidity test\n" );
	if ( wiringPiSetup() == -1 )
		exit( 1 );
	while ( 1 )
	{
		read_dht_data();
		delay( 2000 ); /* wait 2 seconds before next read */
	}
	return(0);
}
To compile the code, you need to install the wiringPi first, then run:
cc -Wall dht.c -o dht -lwiringPi
After the compiling, you will see an executable file named “dht” and you can run it with:
sudo ./dht
Then it will print the temperature and humidity on the console for every 2 seconds. Sometimes the reading may fail, and you see a message “Data not good, skip” on the console. That’s because reading from DHT11/22 module is quite critical to timing, if the CPU is assigned to execute some other tasks in the background, it may not fit the timing requirement and cause a reading failure. In real application, you should cache the last good data read from the sensor, and return the cached data when reading is failed.
The way to read data from DHT11 and DHT22 is the same, the only different part is how to process the data you read. Pay attention to line 69~72 and line 74~77, they make sure both DHT11 and DHT22 can work with this code.
Python Example?
It should be possible to implement an example with Python language as well. However, using pure Python to read DHT11/22 sensor might not get ideal result, since the CPU has bigger chance to be assigned with other tasks during the reading, and cause very high chance to fail, which make it almost not usable.
A workaround is to implement the reading in C and then wrap it as Python library, or using an Arduino to read the DHT sensor.