Home Assistant is an open-source home automation platform that allows users to monitor and control various smart devices and services in their home. It is design
ed to integrate with a wide range of devices, including lights, switches, sensors, thermostats, cameras, and more, from different manufacturers and protocols.
As a single board computer with screen, speaker, microphone and PoE interface, Vivid Unit is very suitable to run Home Assistant and act as a convenient terminal.
There are four ways to install Home Assistant to a device:
- Home Assistant Operating System
- Home Assistant Container
- Home Assistant Core
- Home Assistant Supervised
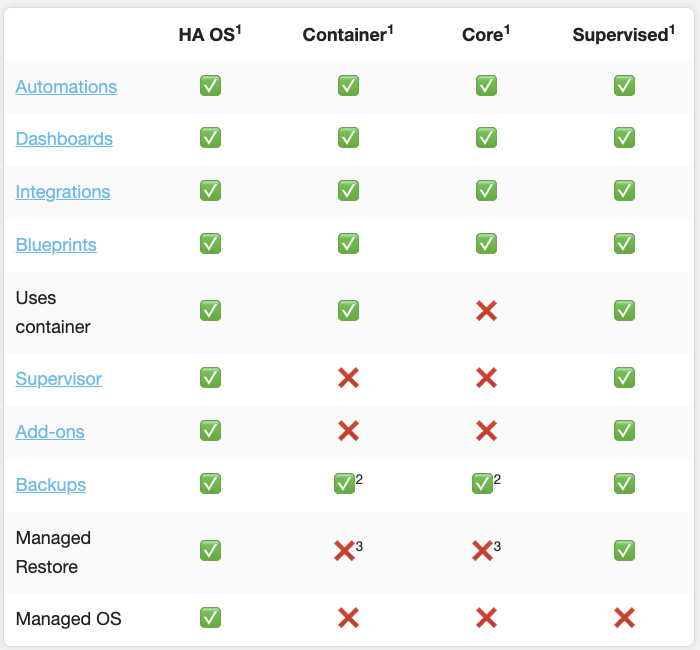
The figure on the right compares all these methods, you may also find detailed comparison here.
Home Assistant Supervised gives you all features of Home Assistant, while you still keep a standard Debian linux system. This tutorial is about how to install Home Assistant Supervised on Vivid Unit.
Update Linux Kernel
This tutorial assumes that your Vivid Unit comes with the default OS (Debian 11). In order to install Home Assistant Supervised, you will need to update the Linux kernel first, because the default kernel is too light-weighted and it doens’t support some features required by Home Assistant Supervised.
First turn on your Vivid Unit, and open the terminal. Alternatively you can login to your Vivid Unit via SSH. Download the new kernel with this command:
wget https://www.vividunit.com/download/kernel/debian_kernel_5.10.110_vivid_unit_recompiled.zip
If you see some error messages about the website certificate, check the system time in your Vivid Unit, most probably the time is incorrect, which causes such kind of issue. If it is the case, you may run this command to fix it:
sudo date -s "$(wget --method=HEAD -qSO- --max-redirect=0 google.com 2>&1 | sed -n 's/^ *Date: *//p')"
After downloading the ZIP file, you can extract it with:
unzip debian_kernel_5.10.110_vivid_unit_recompiled.zip -d new_kernel
Now update the kernel with these commands:
cd new_kernel
sudo cp bcmdhd.ko /system/lib/modules/bcmdhd.ko
sudo cp dhd_static_buf.ko /system/lib/modules/dhd_static_buf.ko
sudo dd if=boot.img of=/dev/mmcblk0p4 conv=fsync
sudo reboot
After the reboot, you may use this command to confirm the compiling time of the kernel:
uname -v
If you see the compiling date is March 30th 2024, then you have succesfully updated the kernel.
Install Some Dependancies
In order to solve some potentional dependency issues, you can install aptitude first.
sudo apt install aptitude -y
By replacing “apt” with “aptitude”, you can now install some dependancies and resolve the possible conflicts automatically:
sudo aptitude install \
 apparmor \
 cifs-utils \
 curl \
 dbus \
 jq \
 nfs-common \
 systemd-journal-remote \
 systemd-resolved \
 -y
Install Docker
Now you can run this command to install docker:
curl -fsSL get.docker.com | sh
This command will take a few minutes. After installing docker, if you prefer, you can run the two commands below to allow running docker command without “sudo”:
sudo usermod -aG docker $USER
newgrp docker
You may run these commands to confirm the docker version and docker service status:
docker --version
systemctl status docker.service
Install the OS-Agent
Download the OS-Agent with this command:
wget https://github.com/home-assistant/os-agent/releases/download/1.6.0/os-agent_1.6.0_linux_aarch64.deb
Then install it with dpkg command:
sudo dpkg -i os-agent_1.6.0_linux_aarch64.deb
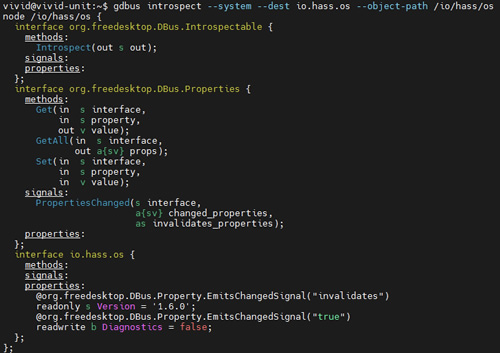
You may run this command to test if the installation was succesfully:
gdbus introspect --system --dest io.hass.os --object-path /io/hass/os
If you get an object introspection (as shown in figure on the right), then your OS-Agent is working well.
 Install the Home Assistant Supervised Debian Package
First download the Home Assistant Supervised Debian package:
wget -O homeassistant-supervised.deb https://github.com/home-assistant/supervised-installer/releases/latest/download/homeassistant-supervised.deb
Then install it:
sudo apt install ./homeassistant-supervised.deb
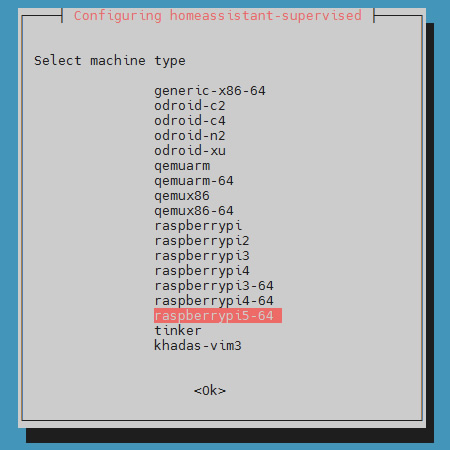
It will request you to choose a machine type. At the moment Vivid Unit is not listed yet, and you can choose “raspberrypi5-64” to finish the installation (as shown on the right).
After the installation you can reboot your Vivid Unit:
sudo reboot
Configure Home Assistant Supervised
Open the web browser on Vivid Unit’s desktop, and visit http://localhost:8123, you should see a page like below:
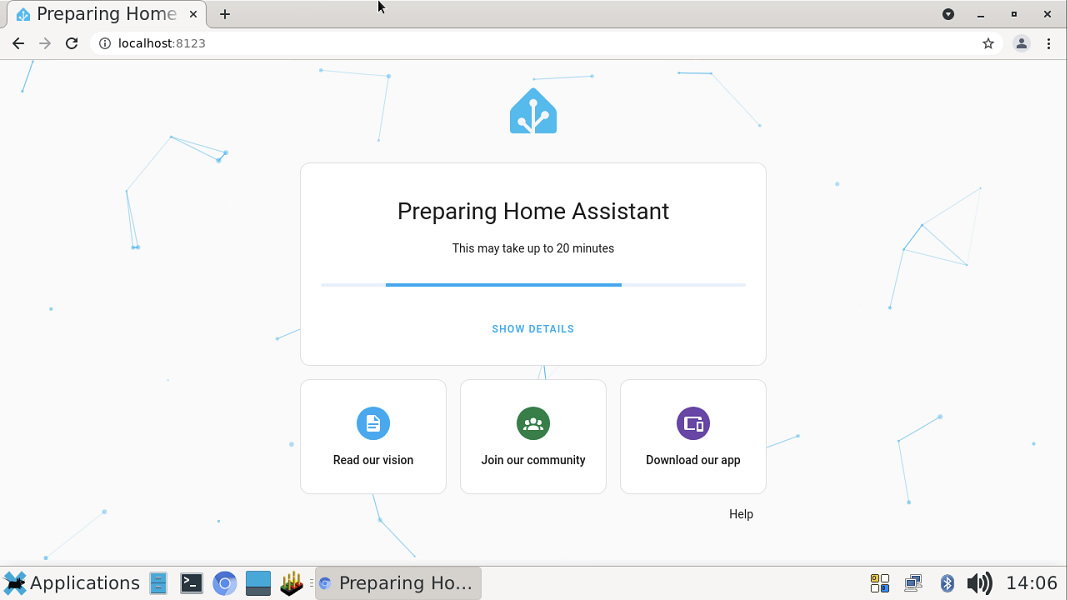
Don’t get panic if your browser says this page can not be reached. Home Assistant Supervised is automatically being installed after the reboot, and sometimes it takes longer than we thought to start running the container, especially when you have a slow network connection. If you wonder what it is doing, you may check the /var/log/syslog file. You may see something like this:
Apr 2 09:41:00 vivid-unit hassio-supervisor[1867]: f7c1ccfc39fa: Verifying Checksum
Apr 2 09:41:00 vivid-unit hassio-supervisor[1867]: f7c1ccfc39fa: Download complete
Apr 2 09:41:04 vivid-unit hassio-supervisor[1867]: 1692bfe8d927: Pull complete
Nothing to worry about as long as you still see new hassio-supervisor items popping up in the log. Sometimes you may encounter DNS issue and Home Assistant Supervised may fail to continue the installation, and you can not access the page above after long wait. In such case you may run these commands in your Vivid Unit:
ha dns options --servers dns://8.8.8.8
ha dns restart
This “Preparing Home Assistant” page can really last for a while. Once it is done, you will be redirected to an onboarding page like this:
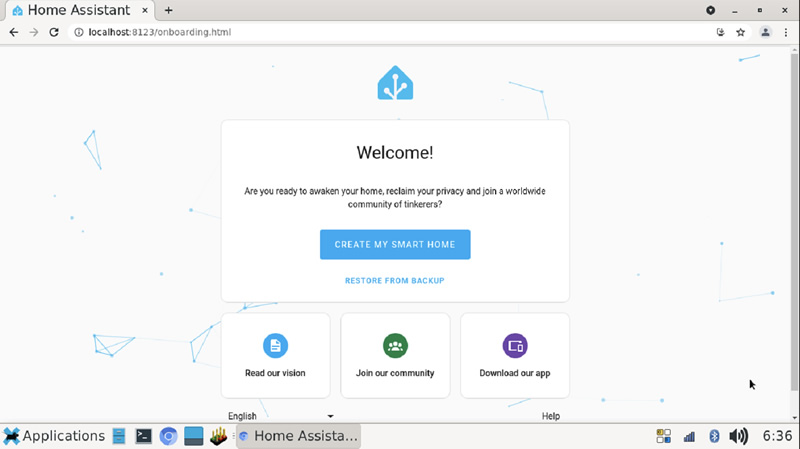
You may wonder, why use localhost instead of the actual IP address to access Home Assistant here? Besides the simplicity, there is another advantage to use localhost: you will be able to access microphone without the need of using HTTPS, which is very convenient when you try to configure Vivid Unit itself as a voice assistant.
Click the blue “CREATE MY SMART HOME” button in the middle, and you will go through a step by step wizard to collect some information for creating a user account. After clicking the “FINISH” button at the end of the wizard, for unknown reason you may be redirected to a wrong place (I think it is a bug):
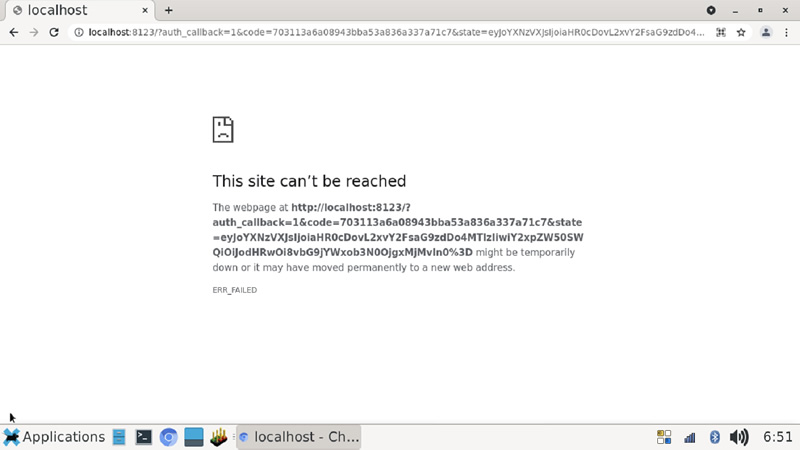
You can input “http://localhost:8123” in the address bar and press ENTER to have it fixed, and you will then see the login page:
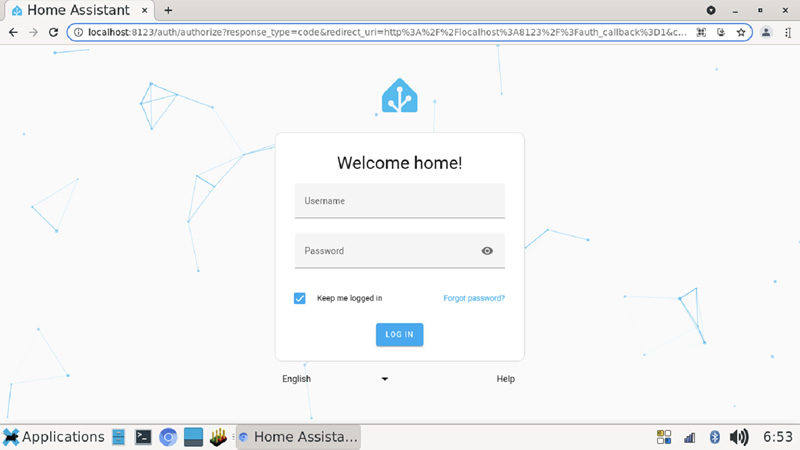
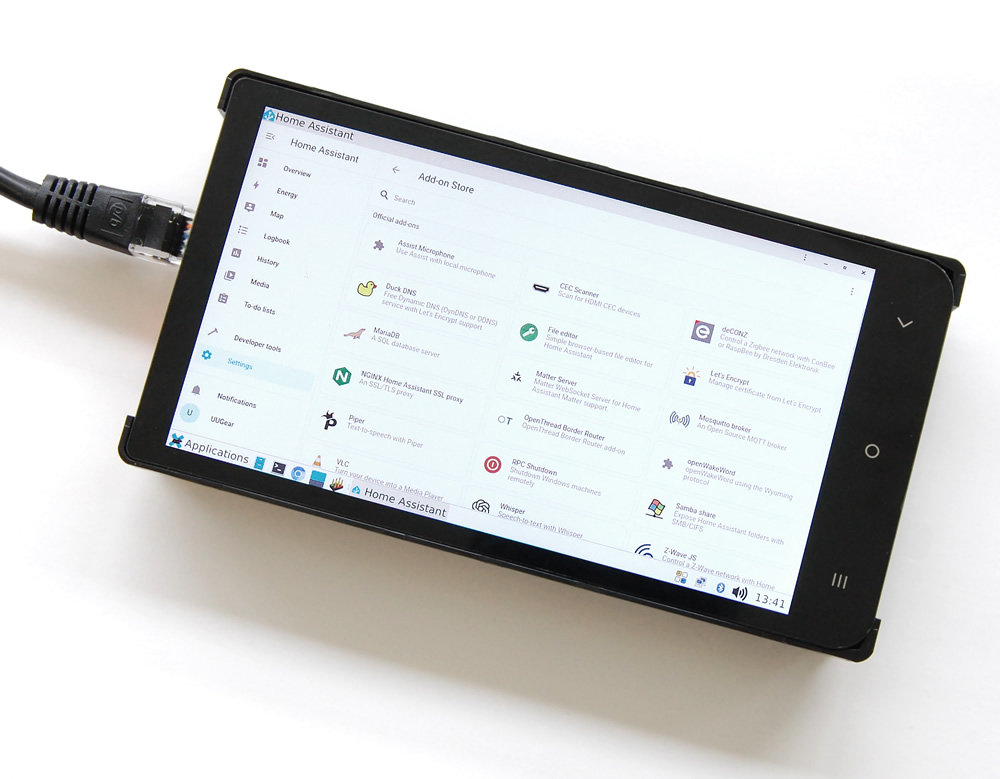
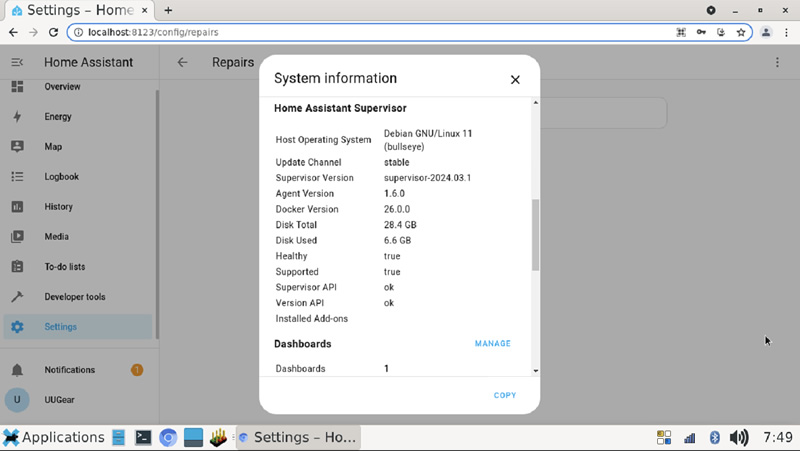
After login you can start using your Home Assistant, including the add-on store! If y0u want to confirm the system information, you can go to Settings->System->Repairs, and click the small button with three dots on the top right orner, then choose “System Information”:
Clean Up
We downloaded some files during the installation, and now we can remove them:
rm debian_kernel_5.10.110_vivid_unit_recompiled.zip
rm -R new_kernel
rm os-agent_1.6.0_linux_aarch64.deb
rm homeassistant-supervised.deb
Fix the Audio Issue
You may notice that, after installing Home Assistant Supervised, your Vivid Unit stops playing audios. This is because the audio device is aggresively occupied by hassio_audio container.
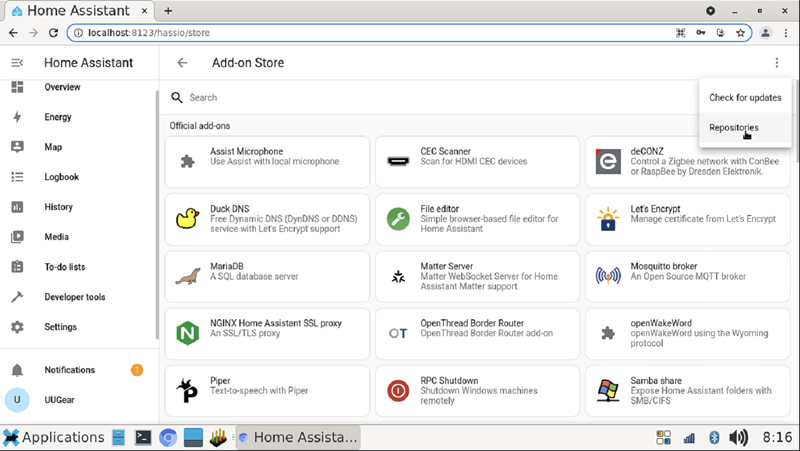
There has been a long discussion about this issue. Although people suggested to load the IDLE module for PulseAudio by default, which I think is a good idea, the develop team doesn’t think so and there is no official fix until now. Fortunately OPHoperHPO offers an add-on to fix this issue. To install this add-on, you need to add “https://github.com/OPHoperHPO/hassio-addons” into the add-on repositories. You can go to Settings->Add-ons, and click the blue “ADD-ON STORE” button, and then click the button with three dots on the top right corner, choose “Repositories” and add that URL into it.
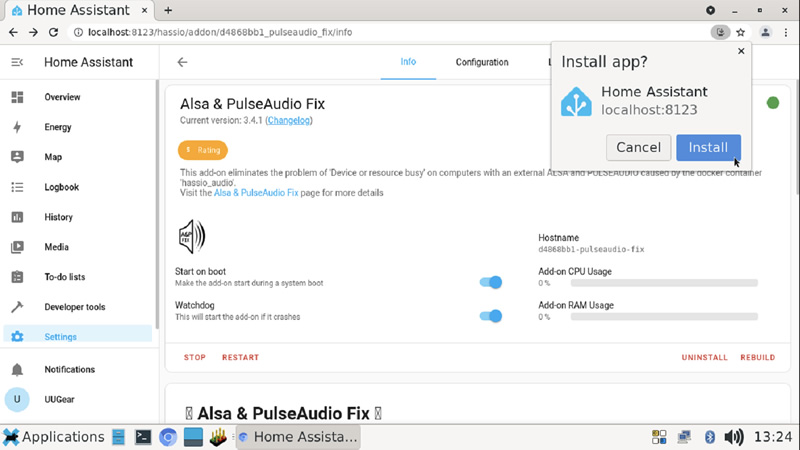
After that you can choose “Check for updates” and it will refresh the add-on list, which you can find the “Alsa & PulseAudio Fix” add-on now. Install this addon and start it, then the problem should disappear.
Turn It to Chromium App
Accessing Home Assistant from web browser is not difficult, but it can be done even eassier. On the right of the browser address bar, there is a ![]() icon, click on it, and then click the “Install” button on the popup window, you will turn this web page to a Chromium App.
icon, click on it, and then click the “Install” button on the popup window, you will turn this web page to a Chromium App.
After doing this, you will find Home Assistant icon on the desktop, as well as in the Applications menu. You can access your Home Assistant with just one click on that icon.
You will notice the address bar is also hidden in Chromium App.