 and Raspberry Pi (3B, 3B+ or 4B) 1")
 and Raspberry Pi (3B, 3B+ or 4B) 2")
 and Raspberry Pi (3B, 3B+ or 4B) 3")
 and Raspberry Pi (3B, 3B+ or 4B) 1")
 and Raspberry Pi (3B, 3B+ or 4B) 2")
 and Raspberry Pi (3B, 3B+ or 4B) 3")
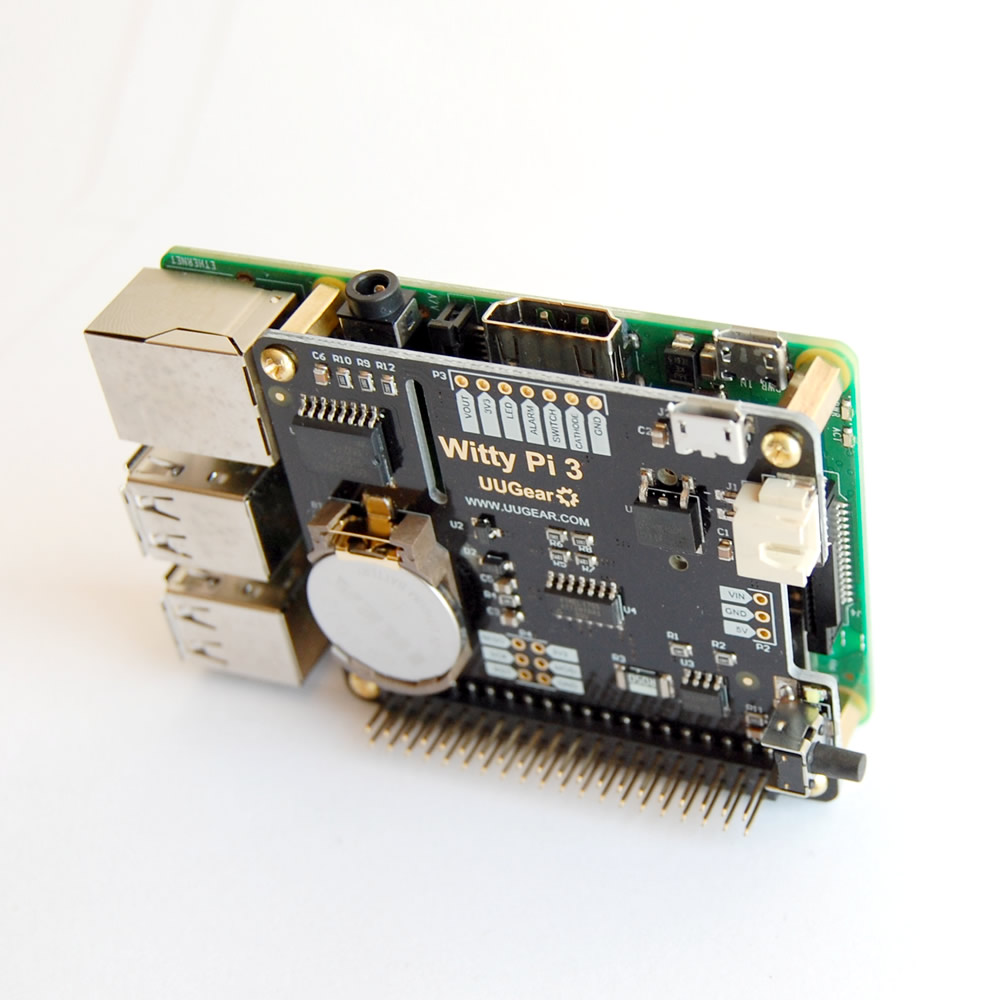
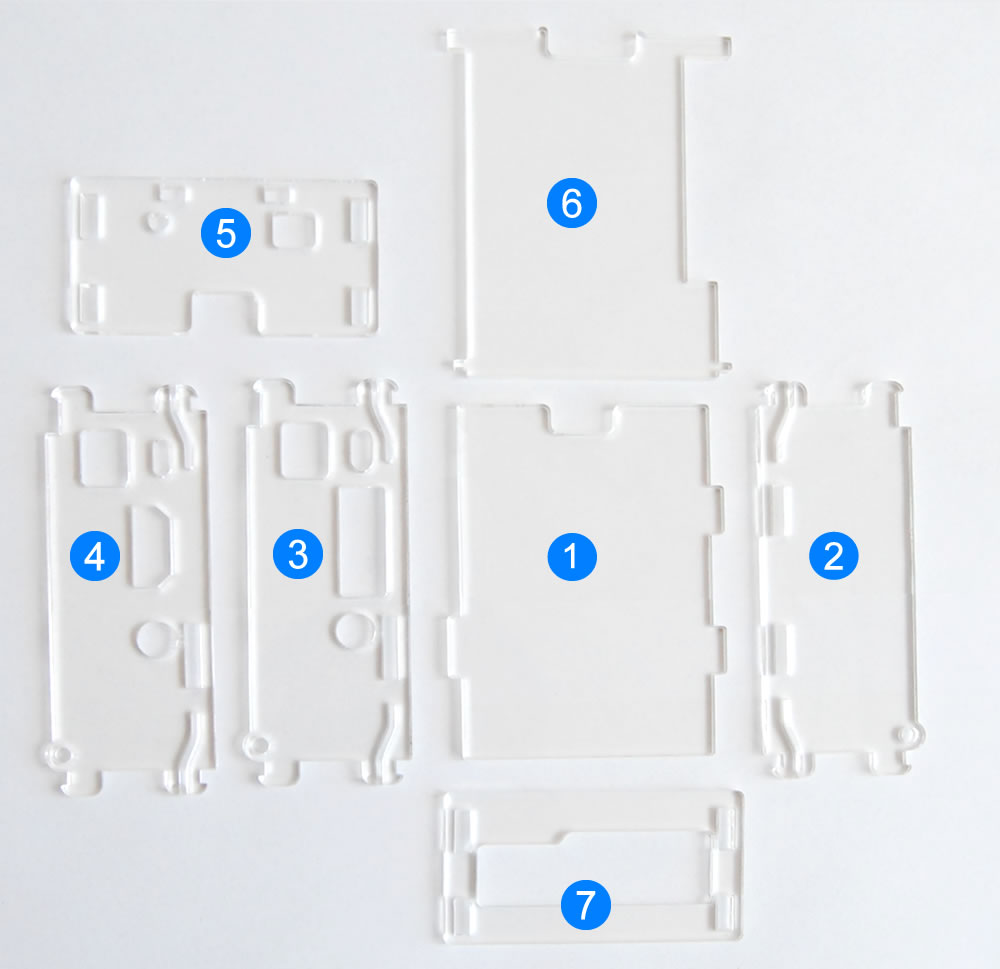
This case is composed 7 pieces of clear acrylic sheets, and can hold your Witty Pi 3 (Rev1 or Rev2) or Witty Pi 4 with Raspberry Pi (model 3B, 3B+ or 4B) together. The acrylic sheets are 3mm thick and the case can protect your Witty Pi and Raspberry Pi very well.
The top cover can be opened so you can setup the jumpers or replace the battery. There is also a window for GPIO header, so you can still access all GPIO pins.
Step by Step Assembly Guide
Before starting the assembly, please follow the instructions in Witty Pi’s user manual and have Witty Pi 3 or 4 firmly mounted above your Raspberry Pi 3B/3B+/4B.
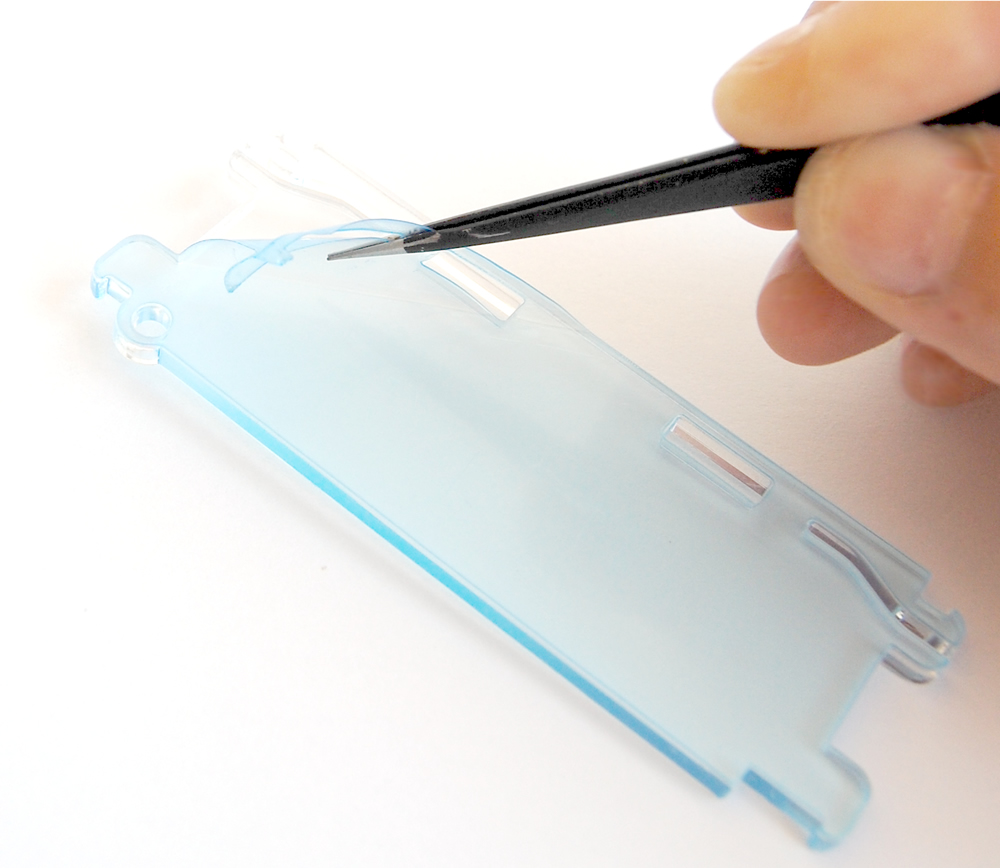
The case is composed of 7 acrylic plates. Each acrylic plate has protective membrane on its surfaces, and you will need to remove the membrane before going to the next step. Use tweezers or fingernails to peel off the membrane on both sides carefully, then you will see the smooth surfaces and the pieces will become transparent.
Now we have all 7 pieces ready. Here we mark them with number 1~7, to ease the description of later steps. The piece with number 1 will be described as piece #1.
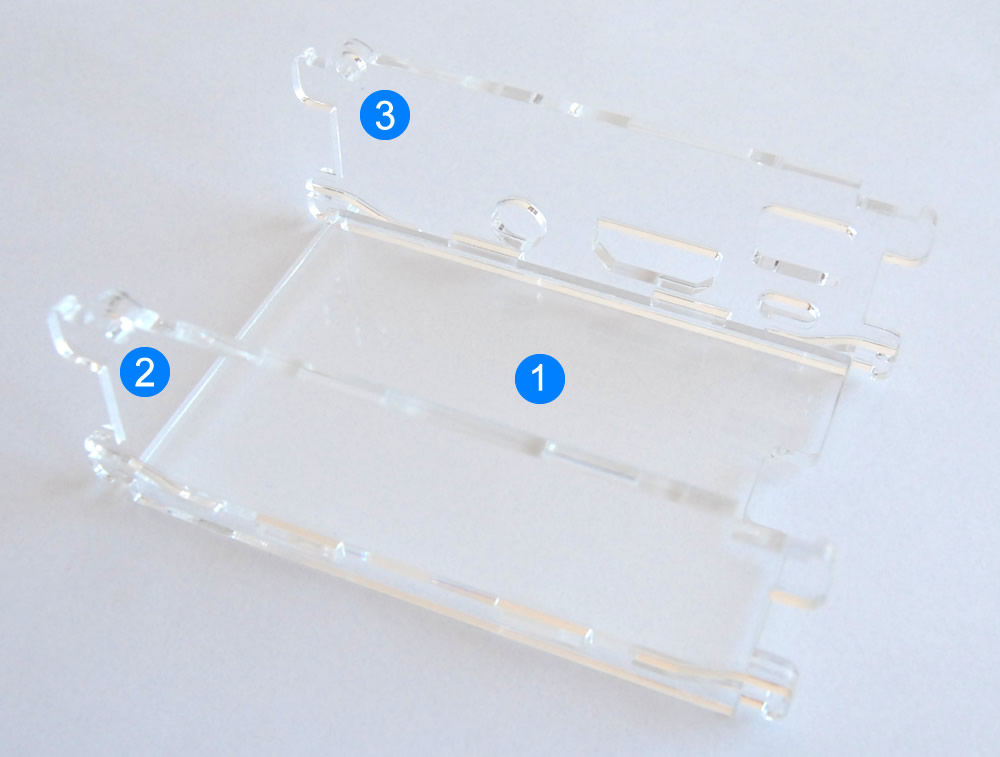
Connect piece #1, piece #2 and piece #4 together, as shown below. If you are using Raspberry Pi 4, you need to replace piece #4 with piece #3. Please also make sure the pieces are placed in the correct direction.
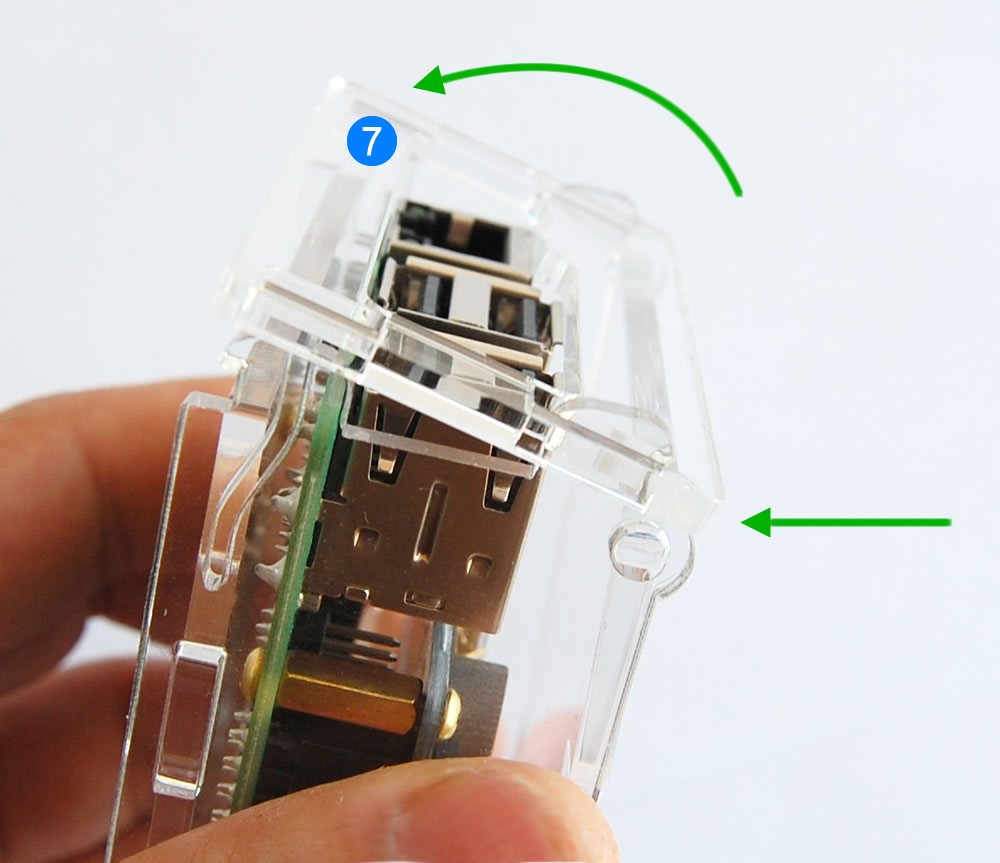
Slide the top of the piece #5 over the two hooks on top, then gently pivot the plate downward over the two hooks at bottom. It should snap to the position. BE CAREFUL: if you feel big resistance, don’t push it, or you might break the hook. Please double check the direction of piece #5, the round hole or button should be on top-left position.

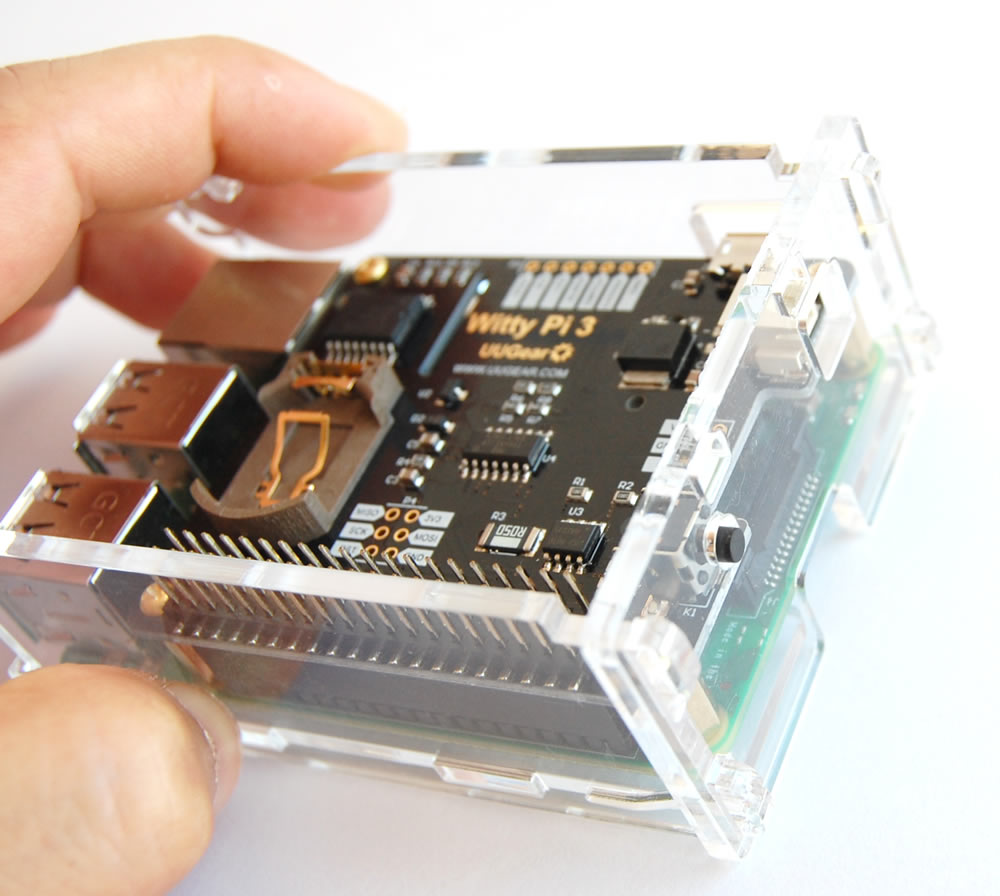
Put your Witty Pi 3 + Raspberry Pi in place, and use your hand to hold piece #2 and piece #3 (or #4 if you use Raspberry Pi 4).
Now mount the top cover (piece #6) on the other side. Make sure the direction is correct (the top cover has windows for GPIO headers).
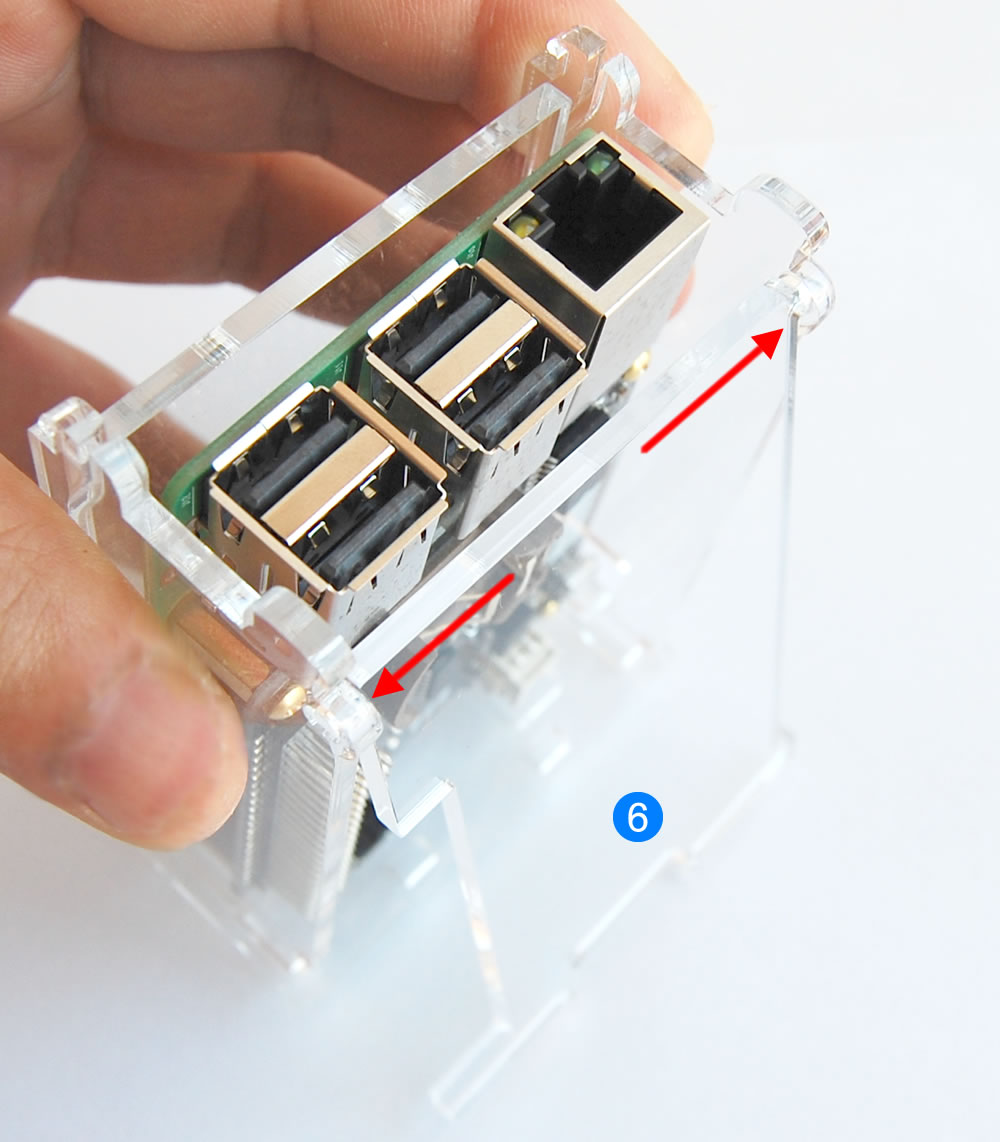
Finally you can assembly piece #7 in the same way for piece #5. Please pay attention here, if you are using Raspberry Pi 4, you need to flip place #7 before assembly it, because Raspberry Pi 4 flip the positions for USB ports and ethernet port. BE CAREFUL: if you feel big resistance, don’t push it, or you might break the hook.
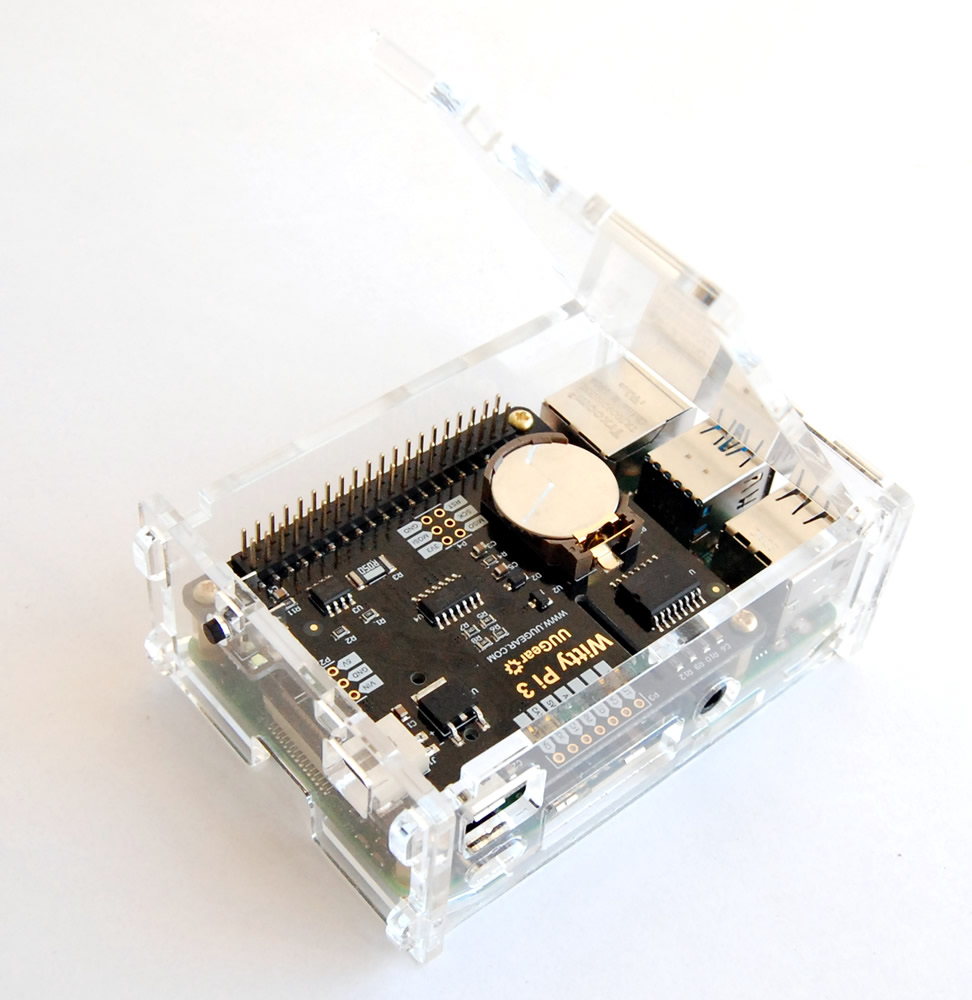
Now the assembly is done. Enjoy it!

 1")


 1")
Reviews
There are no reviews yet.