


Description
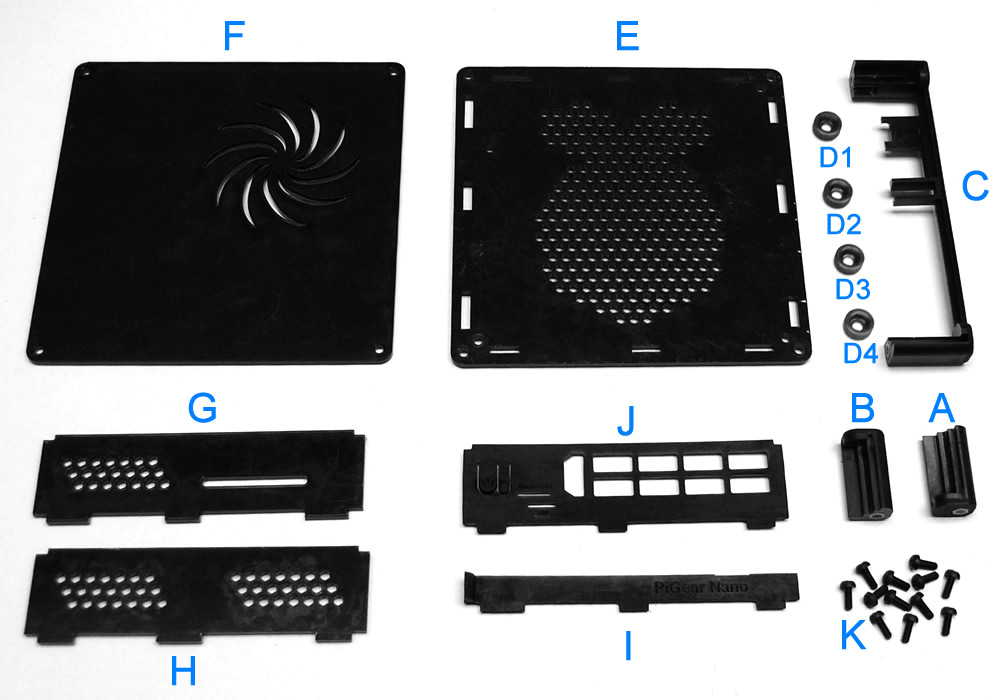
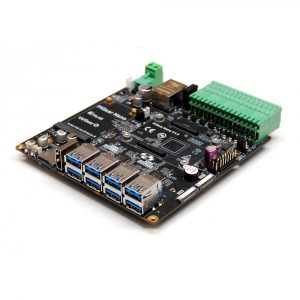
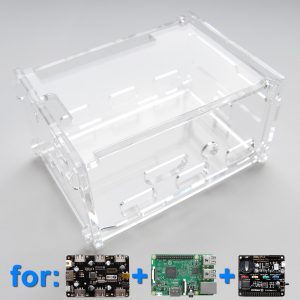
This is a Nano-ITX case designed for PiGear Nano, and it comes as a kit which contains several parts (as shown in figure below). The STL files of this case kit can also be found here.
If you don’t want to assemble them by yourself, you may also order the fully assembled computer.
The bottom, top, right and left panels (E, F, G and H) are laser cut Acrylic panels (with glossy or matted outer surface, depends on the variation you chose), while other parts (A, B, C, D1~D4, I and J) are SLA 3D printed (Stereolithography) parts. The kit also include twelve M3 plastic screws (K), and part A, B and C also has plastic M3 standoffs embedded.
Step by Step Assembly Guide
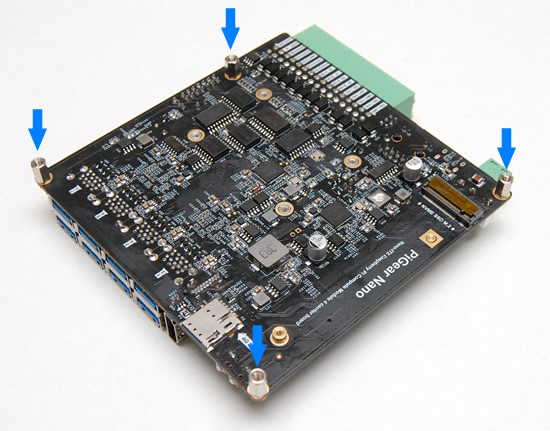
Before starting the assembly, please install the 4 metal standoffs (M3 x 8mm) on PiGear Nano and secure them with M3 copper screws.
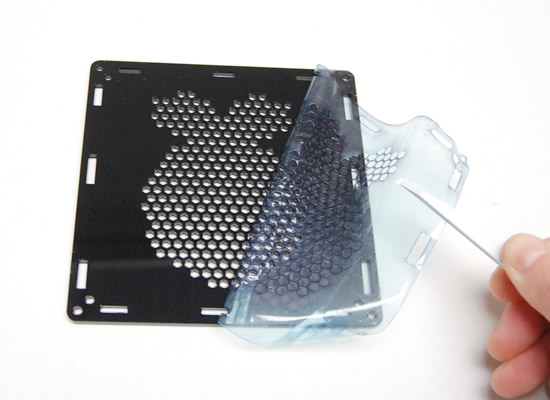
Use tweezers or fingernail to peel off the protective membrane on both surfaces of Acrylic plates (E, F, G and H).
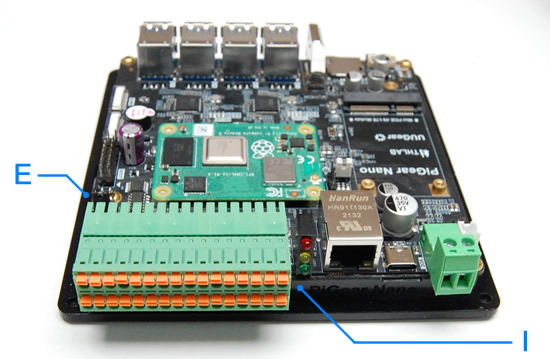
Put the bottom part of rear panel (I) on the bottom panel (E), and insert part I’s three feet into the three slots on bottom panel. If you are not sure where the part I should be placed, take the raspberry pattern on bottom panel as reference, and the part I should be placed above the leafs of raspberry. Put your PiGear Nano on the bottom panel, and then fix it to the bottom panel with 4 plastic screws (K). The picture below shows how they put together, please notice the direction is reversed: the bottom part of rear panel is now on the front in the picture.
Now put the front panel (J), left panel (H) and right panel (G) on the bottom panel. The slots-feet combinations are unique, and you won’t be able to put a panel at a wrong place, or with a wrong orientation.
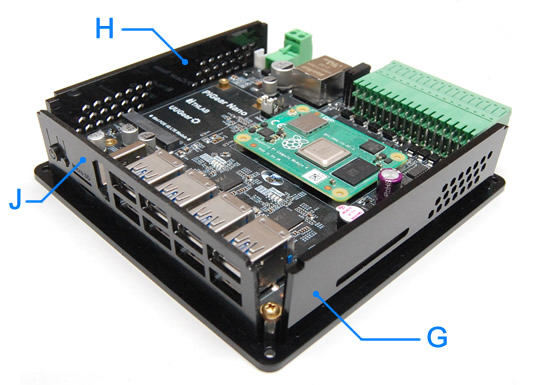
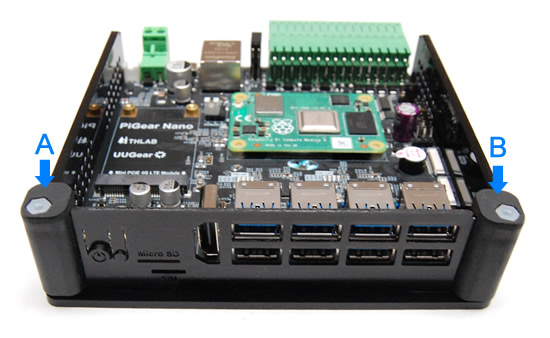
Put the two pillars (A and B) between the panels. Pillar A should be on the left and B should be on the right. As shown below:
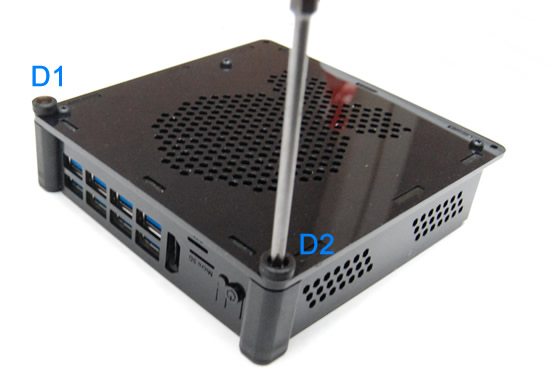
Carefully flip the device and use plastic M3 screws to install the feet (D1 and D2) under pillar A and pillar B. The screw should go through the bottom panel and fasten the standoff embedded in the pillar.
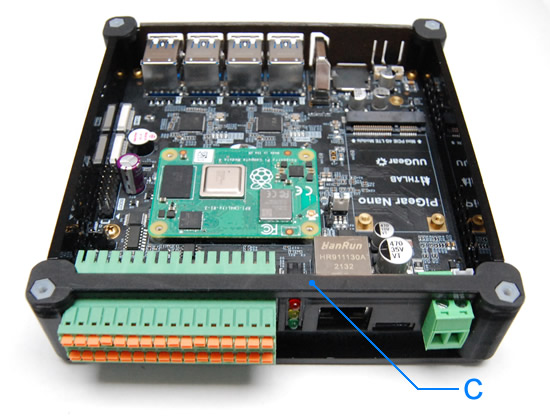
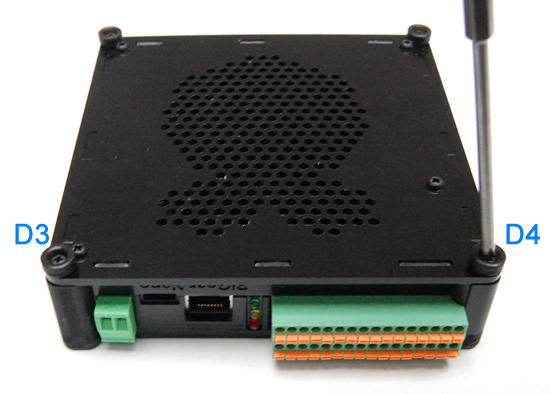
Flip the device again and put the top part of rear panel (C) in place.
Use another two plastic screws to install another two feet (D3 and D4) underneath.
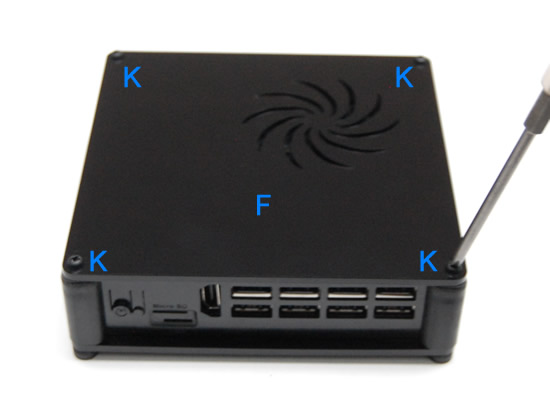
The last step is to mount the top panel, and secure it with four plastic screws.
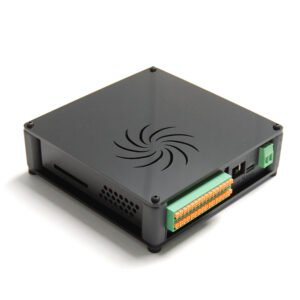
All done! Enjoy it.
Reviews
There are no reviews yet.